| |
|
|
| |
Deer Tree Stand Plans
The building of your own personal deer hunting stand is not
hard, but it does require some work. It is fairly simple. Be innovative;
build for comfort, build for safety, you will be in it for long periods of
time. Select good quality woods that will hold up to years of service in the
elements.
I have built many tree stands over the years. Each one was
different but they all shared the same basic structure design.
Doing this, by yourself, in the woods, is as much a challenge as knowing
how. That is why I want to share my design with you.
The platform needs to be big enough to overcome the illusion
that the
distance to the ground causes. I find confidence in being able to move -
without the fear of falling. When you are young, you can hang out on a
cliff, and not be alarmed. But as you get older, your sense of
responsibility changes; so does your respect for height.
Oh, and one important thing to remember; when you build a
stand like these, hunters can't carry them off; for some reason, they can
never get them off of that tree, not even with a sledge hammer and a
crowbar. LOL
You can download any of these pictures by Right Clicking on
them, and then choosing Save As. (save them where you can find them)
|
| |
|
|
| |
 |
| |
|
|
| |
|
| |
|
|
| |
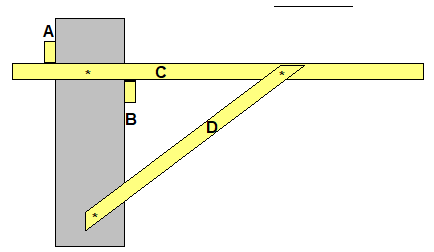 |
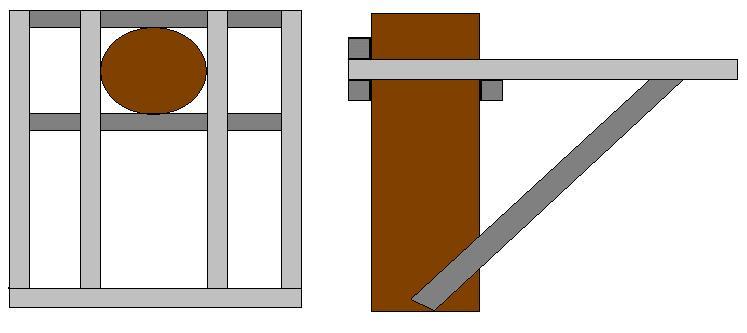
This is the basic support concept using 2x4's
- "C" is one of the main supports for the floor of the stand. It gets
nailed to the tree trunk, but its weight has to be supported.
- "B" supports the back weigh of "C"
- "D" supports the center and front weight of "C"
- "A and B" make it possible to level all "C" supports
As you can see, this makes a strong structure. Once all of your boards
are nailed together, your platform will be very stable. Notice that "C" is
resting on "B" and that "A" is holding the back of "C" down; in other words,
you could remove "D" and "C" will not fall; it is wedged between A and B.
Using this concept, you can assemble and build this by yourself, in the
woods. |
| |
|
|
| |
|
| |
|
|
| |
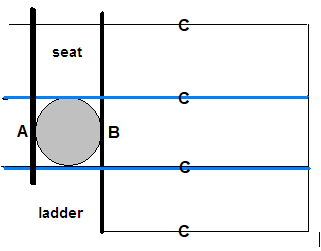 |
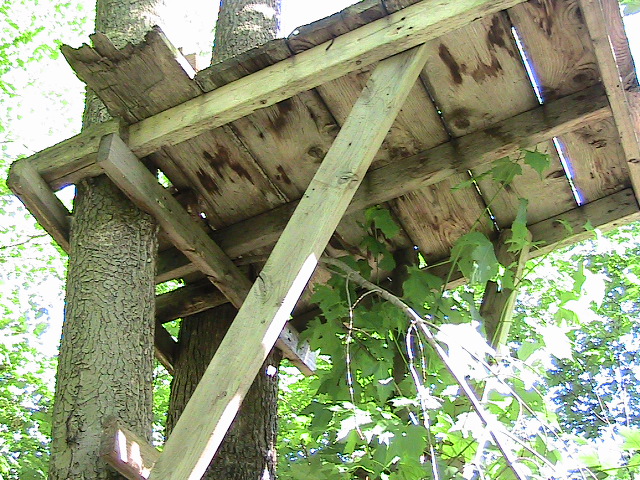
Perhaps now you can see how the platform
support comes together. If "A" and "B" are level, you can slide additional
"C's" into place, level them up, and nail them down so that you can add a
floor on top of them. I like to feel comfortable in the stand. I use about
46 to 48 inches for the width of the floor, and 55 or so inches for the
length. That leaves plenty of room to sand up and move around without fear
of falling.
Of particular interest, notice that the positioning of the ladder allows
you to step off on to the platform, while using the hand rail for balance.
The seat is positioned opposite the ladder. This allows for more room on
the platform. But, as I have learned the hard way, it restricts your
shooting direction. It is better to have the seat in the middle, or at least
extend it out from the tree. You can enhance your safety by adding side rails.
The ladder can be nailed directly to the "A and B" supports, close to the
tree. This gives you room to step off onto the platform. |
| |
|
| |

|
This is a double stand. It uses
two trees for support. Depending on size, it could be scaled up or down.
This is perhaps the most comfortable design I have built. Plenty of room for
a knap. Two hunters are not crowded. A great stand for Adult and Youth
hunting. |
| |
 |
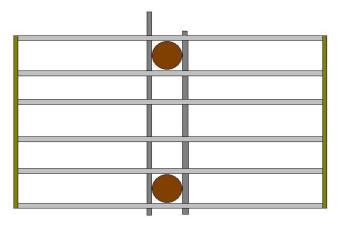
Here is a concept that uses less wood.
Use 2x6 or 2x8 or 2x10 support boards underneath; between 2 trees.
Then use the same for the floor. I suggest using 3 nails as in the picture.
It will make the floor sturdy and quiet.The distance between the trees
and the diameter of the trees may influence the size of the boards you will
need.
Example:
 |
| |
|
|
| |
 |
| |
|
|
| |
|
| |
|
|
| |
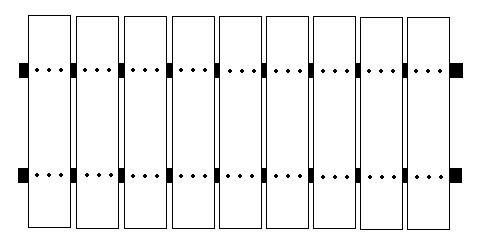
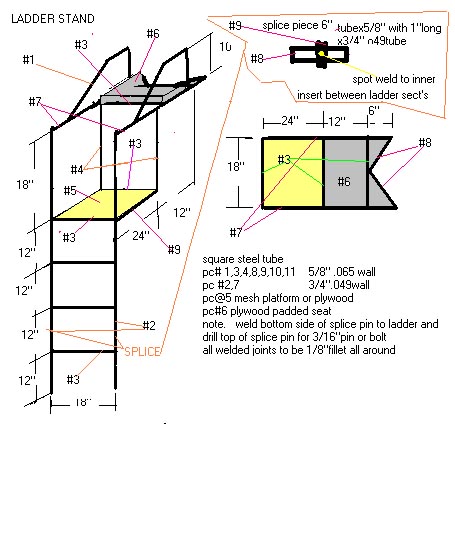
Vertical Lengths of
Ladder:
Ladders are easy to make out of scrap wood. The longest standard length of
2x4 is 20 feet. You will need two pieces. Lay them out side by side with the
2 inch side facing up.Ladder Rungs:
The rungs can be made of 2x4 too. Most of the time, I use 2 feet pieces, but
that is not a rule. Rungs can be spaced about 18 inches apart; more or less.
It is better to have to many rungs than not enough. The top and bottom rungs
need to be conveniently placed where they cause you the least amount of
strain as you get on and off of them. Remember, the ladder is a two way
road; up and down. Make it easy to get on and off safely.
Fasten Rungs to the Ladder:
It is best to use screws. They hold a grip better than a nail, and are
easier to replace. Once a nail gets imbedded, it is difficult to remove
without damaging the wood.
|
| |
|
| |
 |
Here is an interesting stand. It can be built
as a climber or as a ladder stand. Plans are available here:
 |
| |
My Tree Stands |
| |
|
|
| |
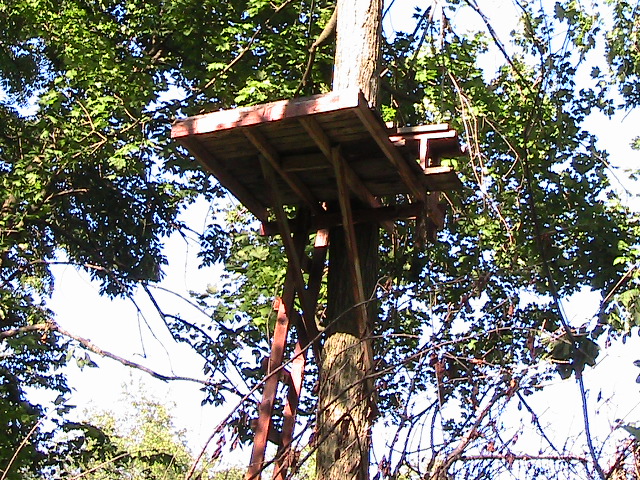
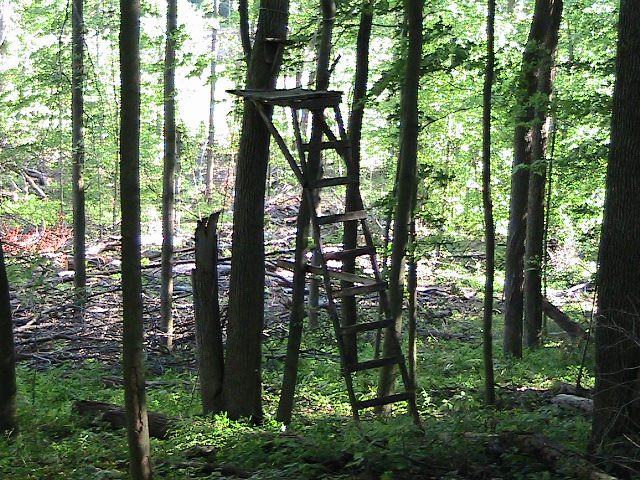
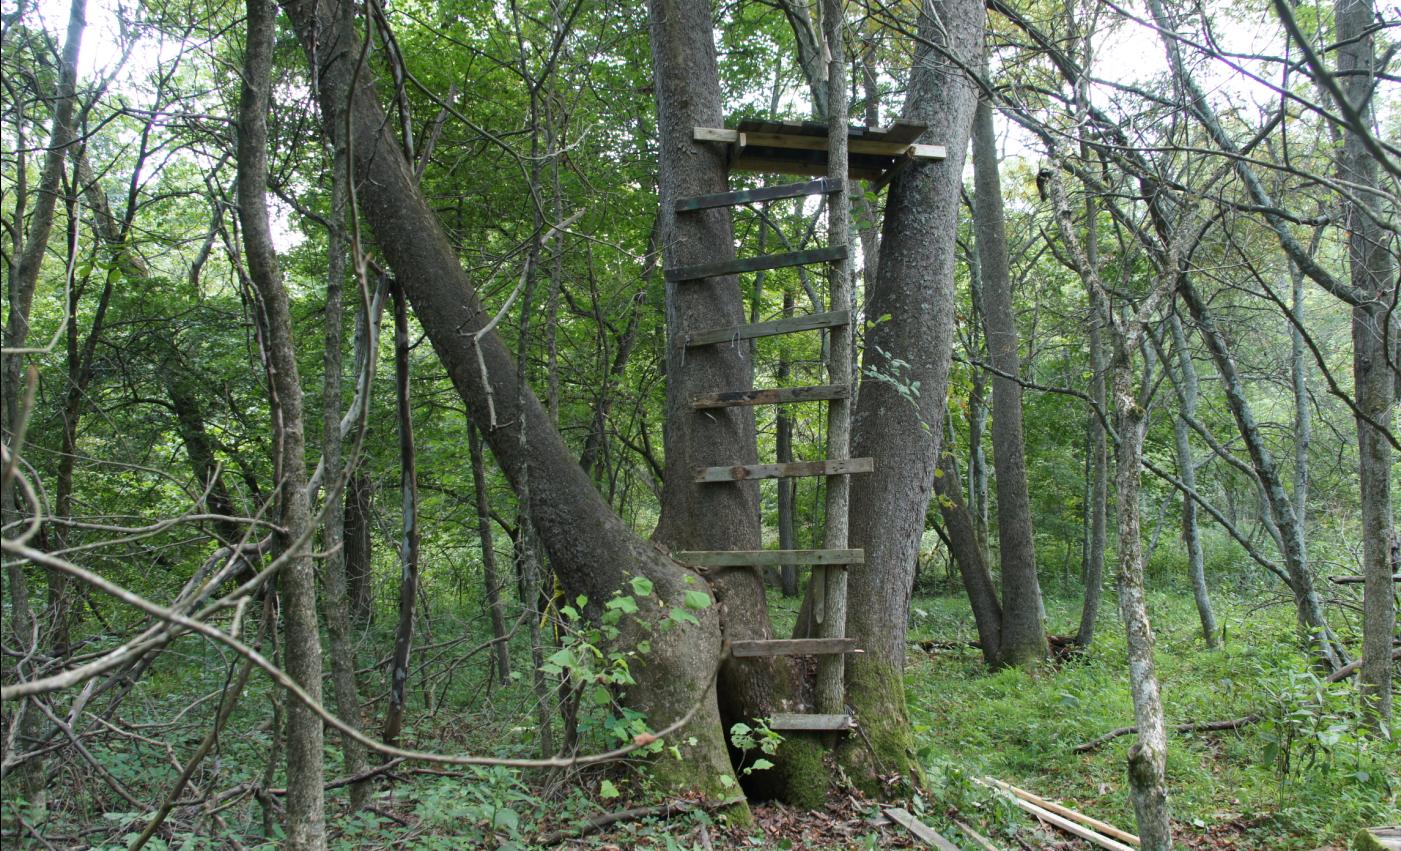
 I built this without using a ladder. It was a bit tricky, but I succeeded. I
started by making steps from the main tree trunk to a smaller tree growing
beside it. That got me high enough to start the platform base. This stand is
about 8 years old. It is made out of 2x4s, with a 2x12 floor. It is very
solid. The steps have not deteriorated one bit.
I built this without using a ladder. It was a bit tricky, but I succeeded. I
started by making steps from the main tree trunk to a smaller tree growing
beside it. That got me high enough to start the platform base. This stand is
about 8 years old. It is made out of 2x4s, with a 2x12 floor. It is very
solid. The steps have not deteriorated one bit. |
| |
|
|
| |
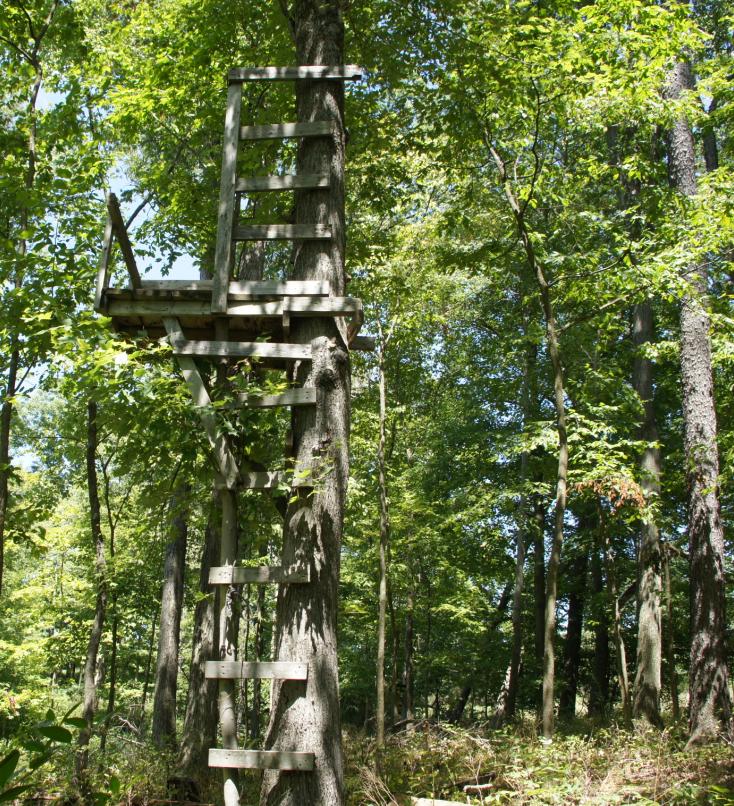
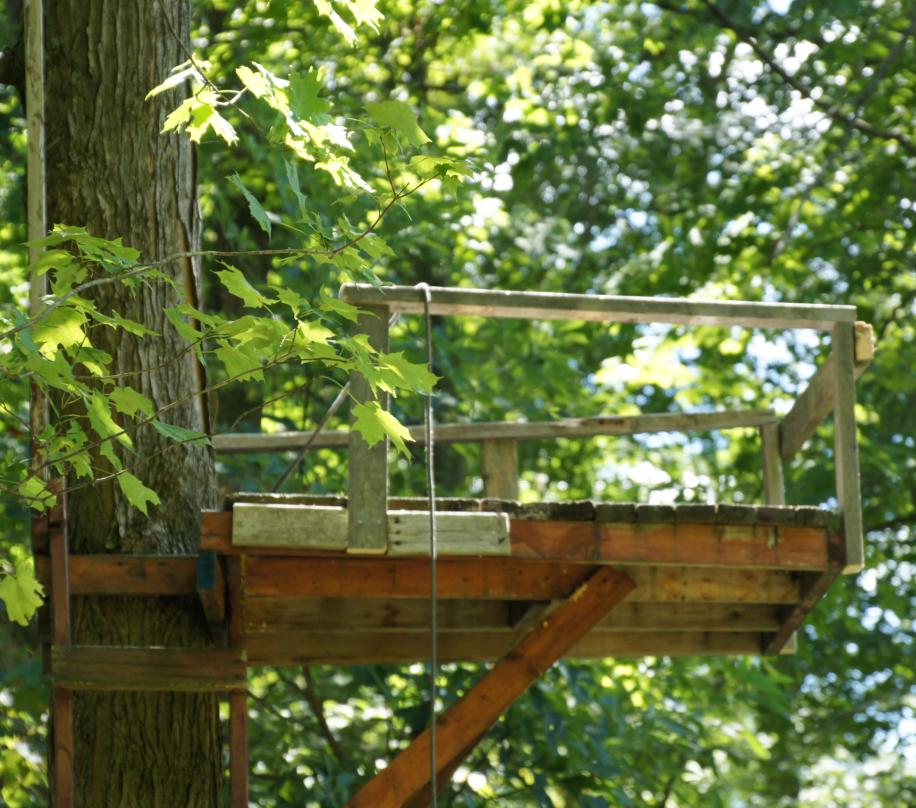
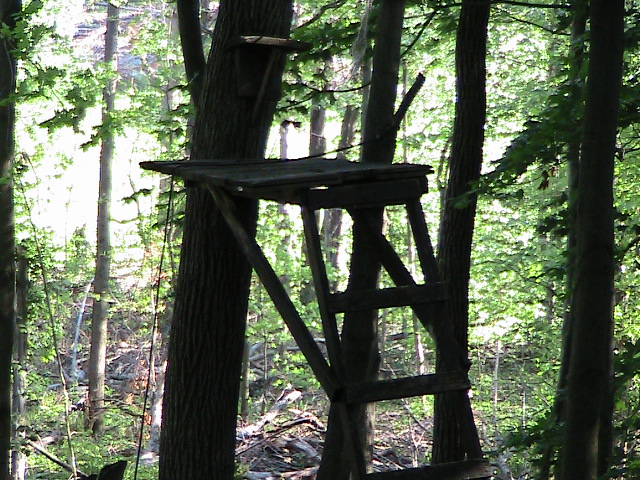
 I added side rails to this one, last season. I also extended the ladder
higher so I could step off onto the platform. It is much easier to climb
in and out of it now. I damn near went to sleep in it.
I added side rails to this one, last season. I also extended the ladder
higher so I could step off onto the platform. It is much easier to climb
in and out of it now. I damn near went to sleep in it.This is a single
tree with 2 trunks. Can you see the seat? It is above the platform, between
the tree trunks. |
| |
|
|
| |
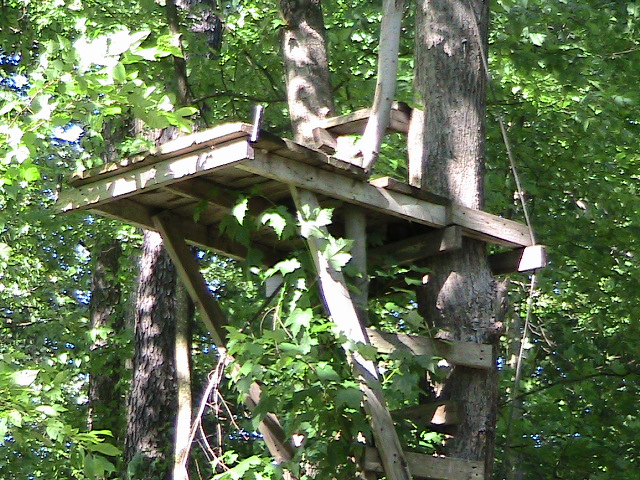
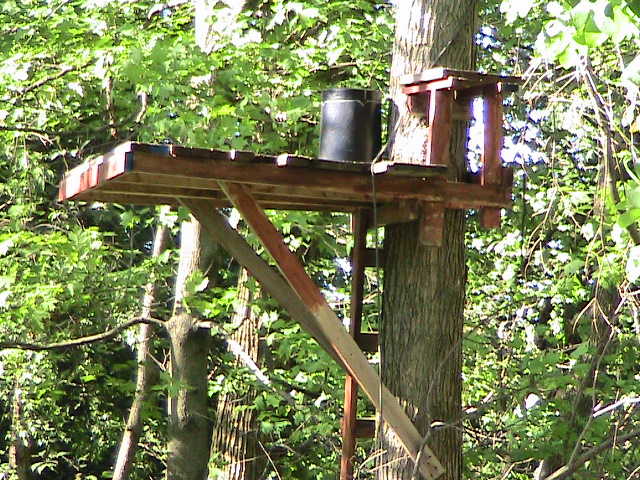
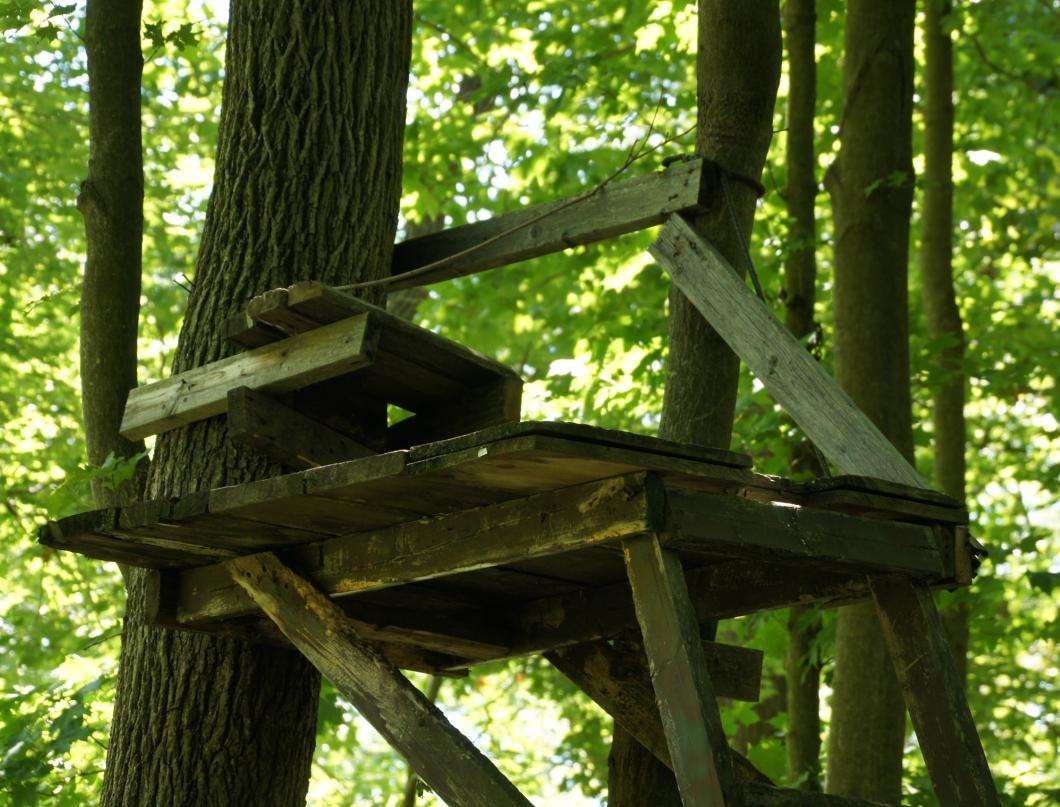
 I fished those floor boards out of a flooded creek. They are not pretty, but
they are solid. This used to be a double stand. There was a platform out the
back. I decided to move it to another location. The nails were so embedded
in the tree, I had to saw off the boards. A crowbar would not pull the
nails.
I fished those floor boards out of a flooded creek. They are not pretty, but
they are solid. This used to be a double stand. There was a platform out the
back. I decided to move it to another location. The nails were so embedded
in the tree, I had to saw off the boards. A crowbar would not pull the
nails.This stand is very roomy, very stable, and very comfortable to be
in. It will easily support 500 pounds. |
| |
|
|
| |
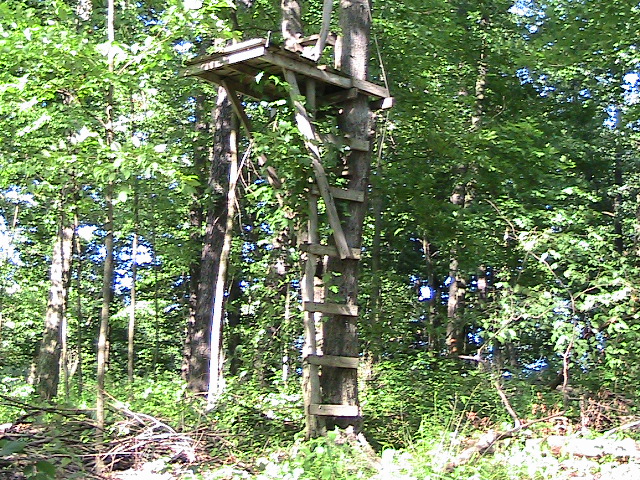
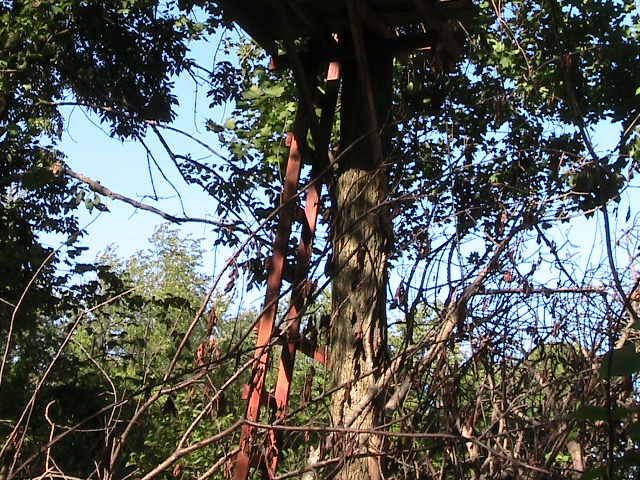
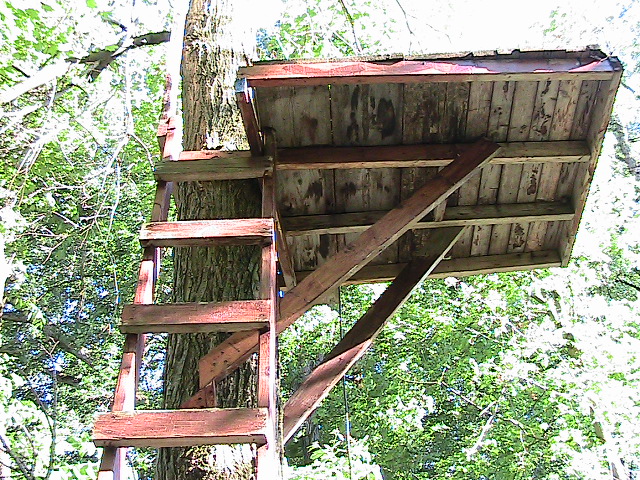
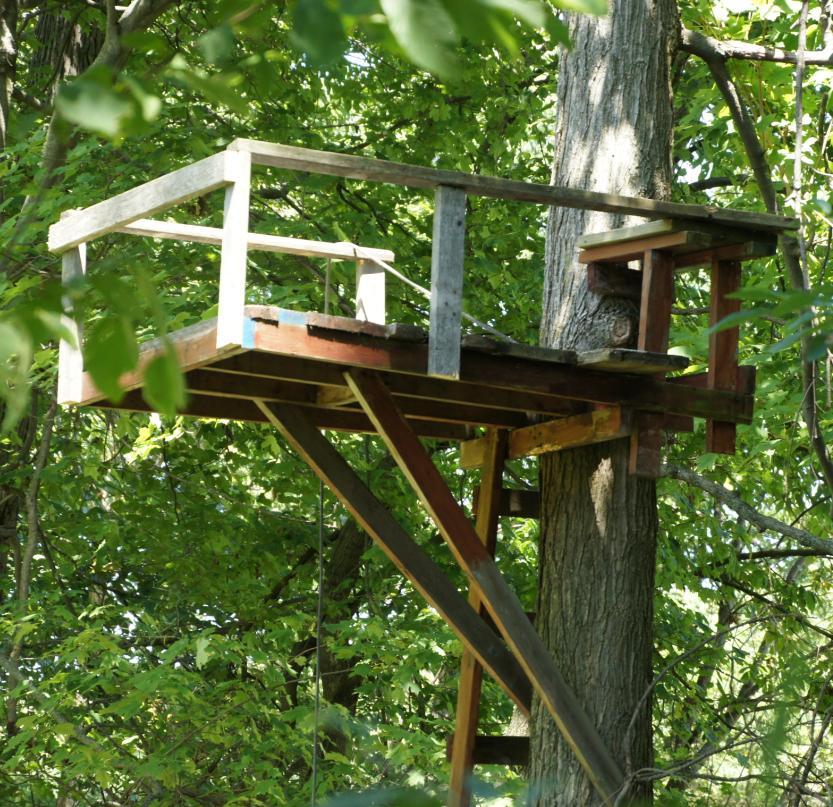
Notice, that the ladder extends on up past the platform. It makes it
easier to get on and off of the platform. |
| |
|
|
| |
 |
| |
|
|
| |
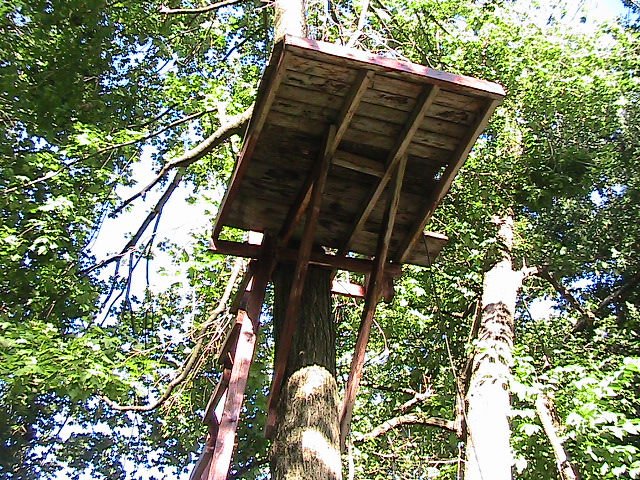
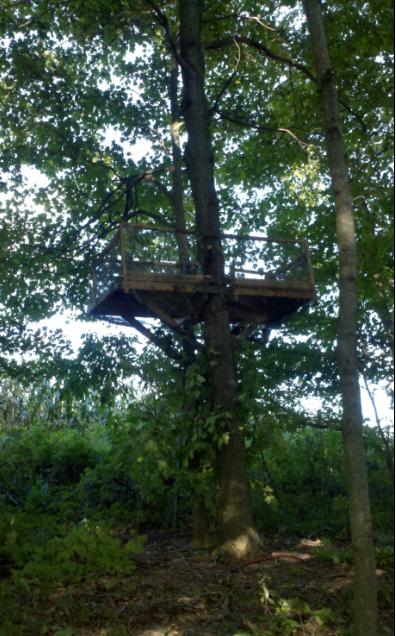
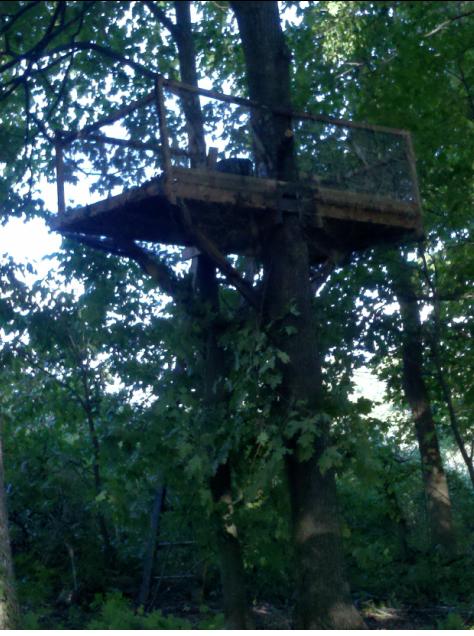
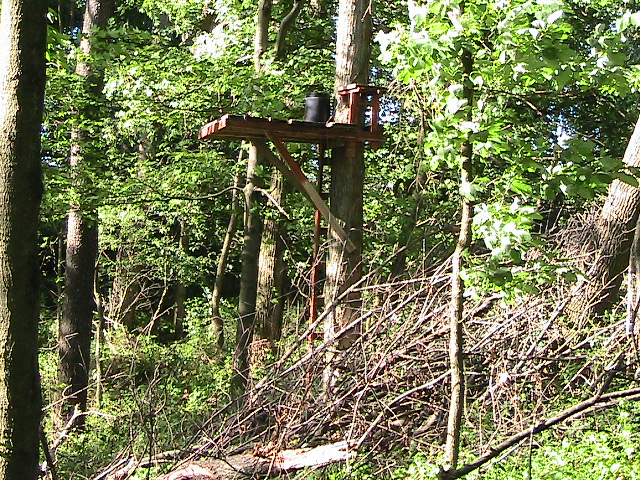 The only thing this stand needs is a side rail, about 22 inches tall. I plan
to add one this year.
The only thing this stand needs is a side rail, about 22 inches tall. I plan
to add one this year.The platform is very roomy; large enough to sleep
on, but better tie yourself in.
The only problem with is stand is the direction it is facing; due West.
The area in front of the stand was clear cut last summer. Now the afternoon
sun pounds me during the month of October and early November. |
| |
|
|
| |
 This is a 16 foot ladder; made from 2x4's
 |
| |
|
|
| |
 It looks heavy, and it is; but it is very sturdy. I jumped up and down on
the outer corners and this thing did not budge.
It looks heavy, and it is; but it is very sturdy. I jumped up and down on
the outer corners and this thing did not budge.Platform construction is
based on my diagrams at the top of this page. |
| |
|
| |
 Use what boards you have. Buy what you can't get for free. The stain varnish
is holding up good.
Use what boards you have. Buy what you can't get for free. The stain varnish
is holding up good.This stand was built 3 years ago. Most of the lumber
came from the back side of my 8 year old stand. |
| |
|
| |
 |
| |
|
| |
 |
| |
|
| |
 |
| |
|
| |
 |
| |
|
| |
 |
| |
|
| |
 |
| |
|
| |
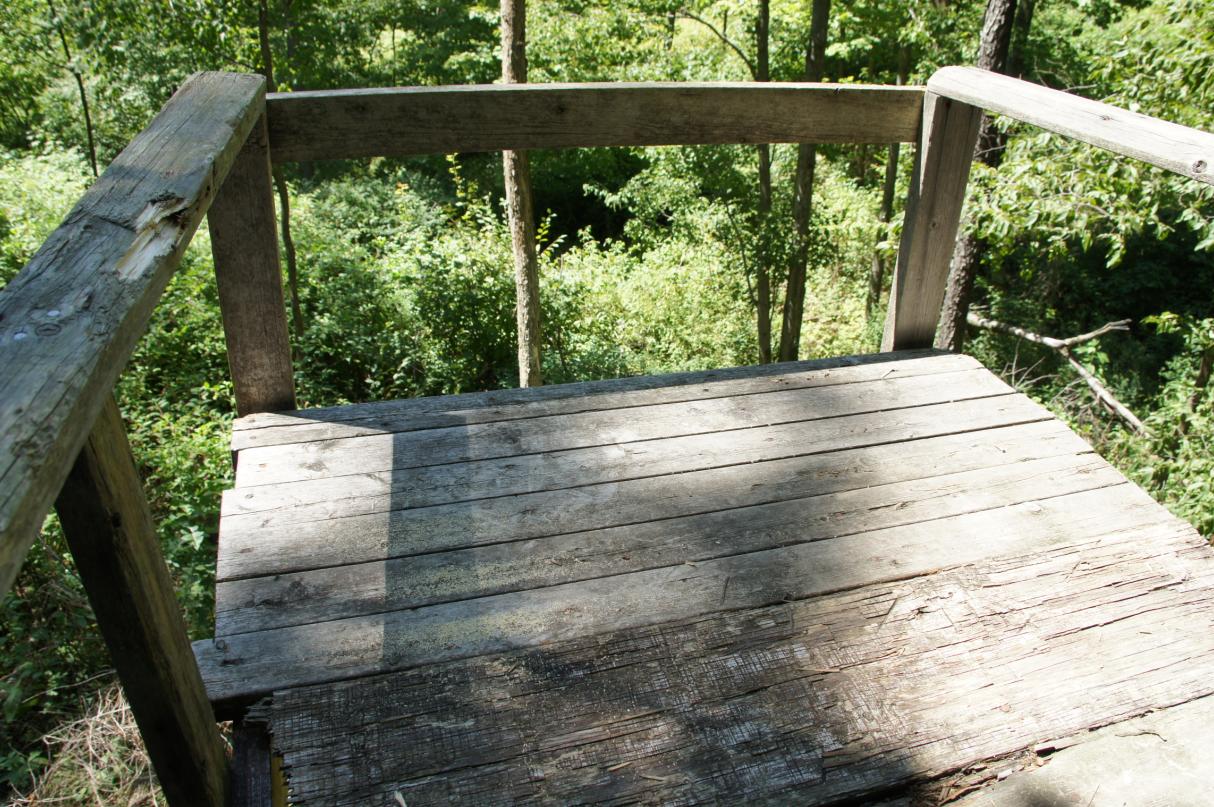
 This is a platform stand I found rotting on the ground after many years of
use. I refurbished it and put it here. It moves a bit when I climb it, but
it is plenty stable. I nailed it to the tree. This past season, I added a
side rail on the right, and a new seat. The seat slants towards the side
rail. During high winds, it is like sitting in a rocking chair. I am
comfortable in it..... as long as it does not roll.
This is a platform stand I found rotting on the ground after many years of
use. I refurbished it and put it here. It moves a bit when I climb it, but
it is plenty stable. I nailed it to the tree. This past season, I added a
side rail on the right, and a new seat. The seat slants towards the side
rail. During high winds, it is like sitting in a rocking chair. I am
comfortable in it..... as long as it does not roll. |
| |
|
| |
 |
| |
|
| |
 |
| |
I built the following stand for a hunter friend that is afraid of
heights. I made him help with the construction.
By the time it was finished, he was comfortable in it. By the time the
hunting season was over, he was at home in it.
Even took a few snoozes. This is a great stand for training youth hunters.
The deck is 4 x 4 on each side, with a walk through.
Steps are on the back side; and I do mean steps, not ladder rungs.
|
| |
 |
| |
|
| |
 |
| |
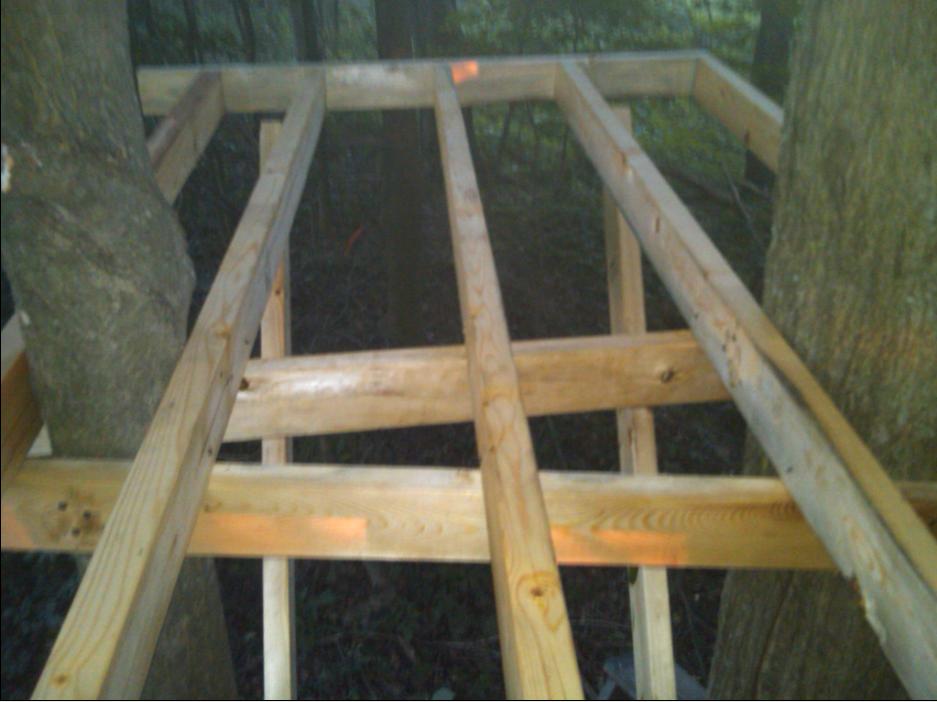
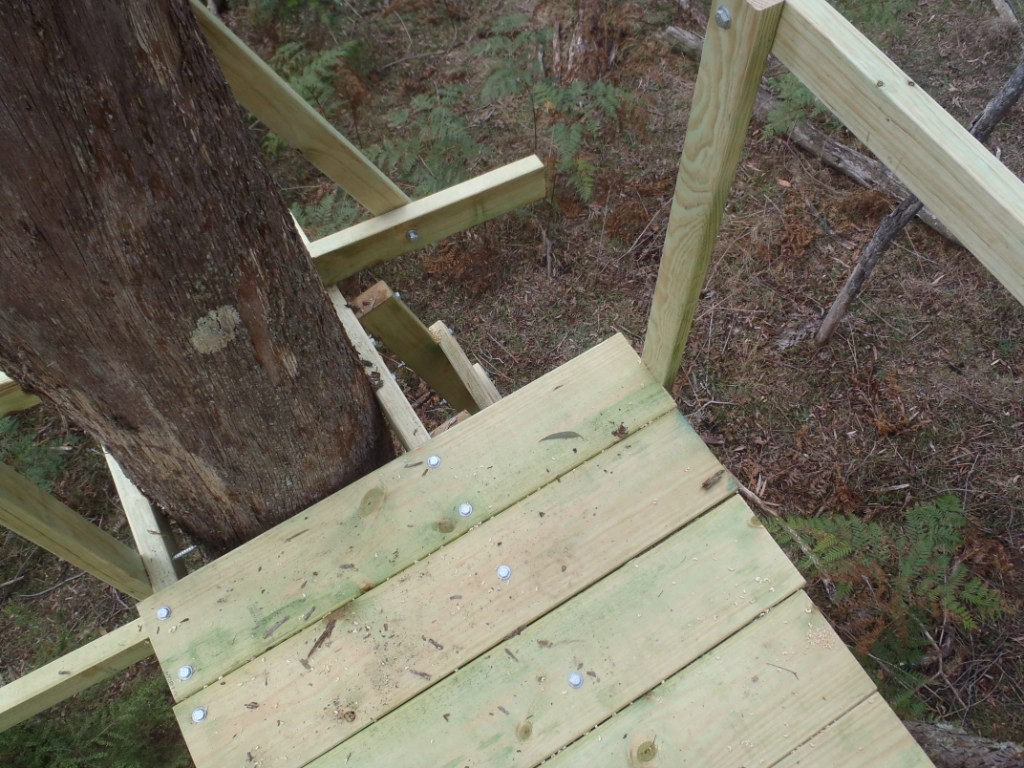
This is the basic floor plan. Notice the two cross supports in the
middle. They extend beyond the outside of the two trees. That provides a
platform for the floor joists. I use another 2x4 to hold the floor joists
equal distance apart (orange sticker). The outer portion of the deck is
supported like a shelf. It is a strong structure. It cost about $60 for the
lumber. |
| |
 |
| |
|
| |
sicamore |
| |
 |
| |
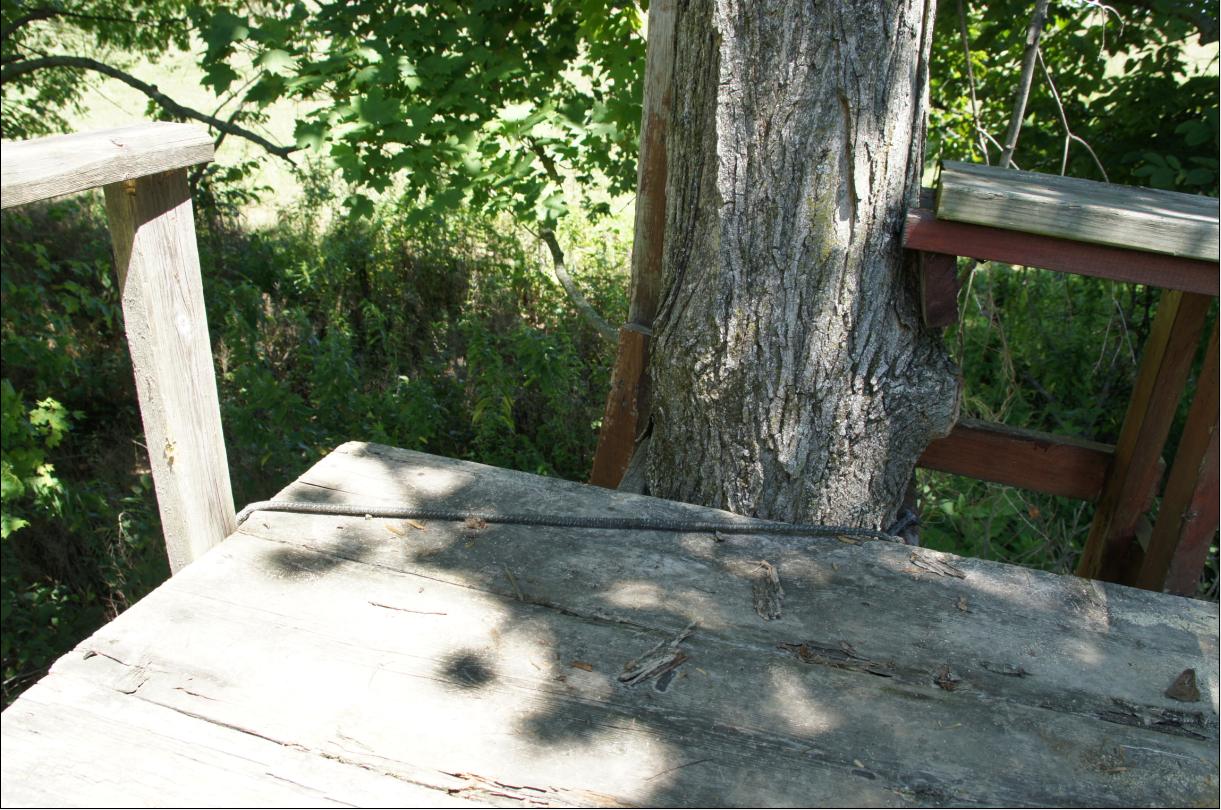
My newest stand. I have ground hunted, from behind this tree, for about 3
years. I finally decided to build a platform in it. It took about 3 hours of
work. All /most of the lumber came from old broken down tree stand. The
floor joists are 6 feet long. Nothing was measured. The old wood blends in with the surrounding
environment. |
| |
|
| |
|
| |
|
| |
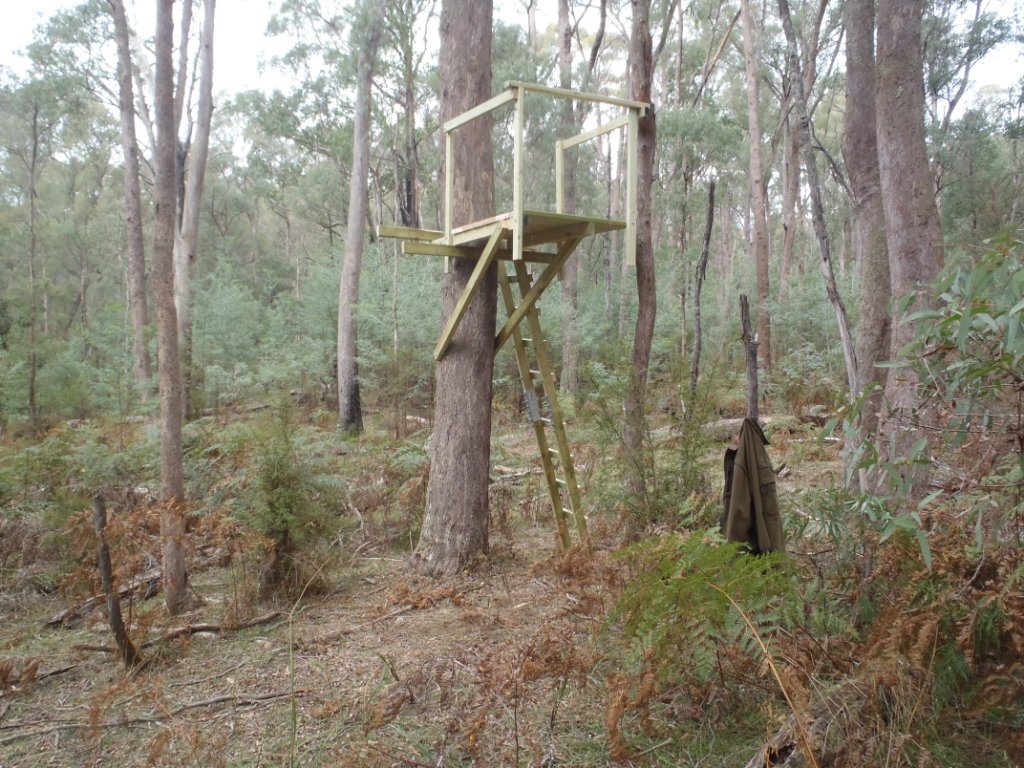
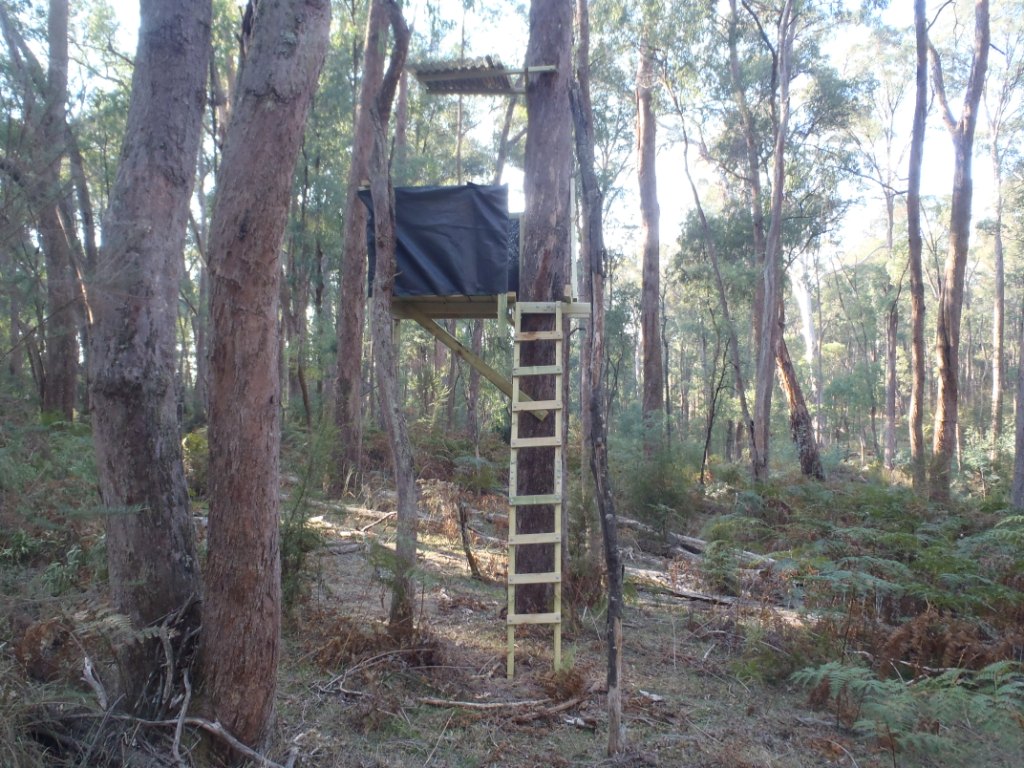
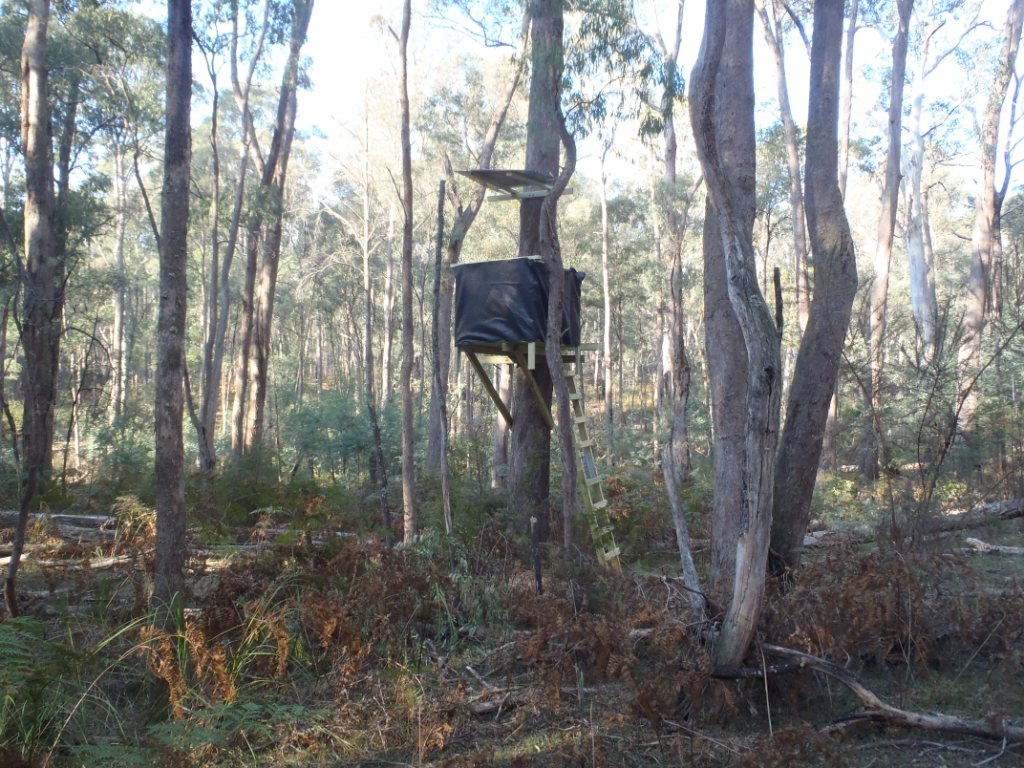
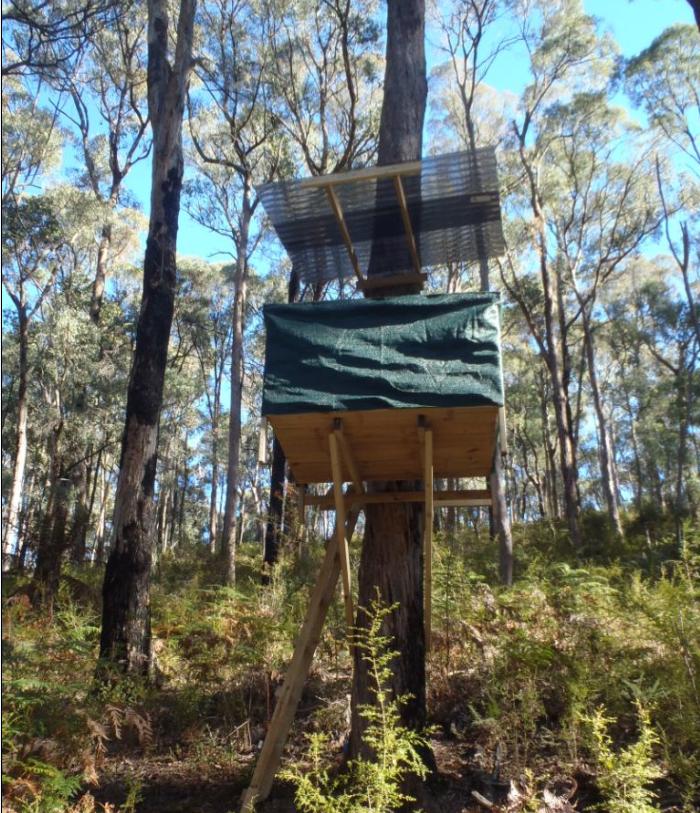
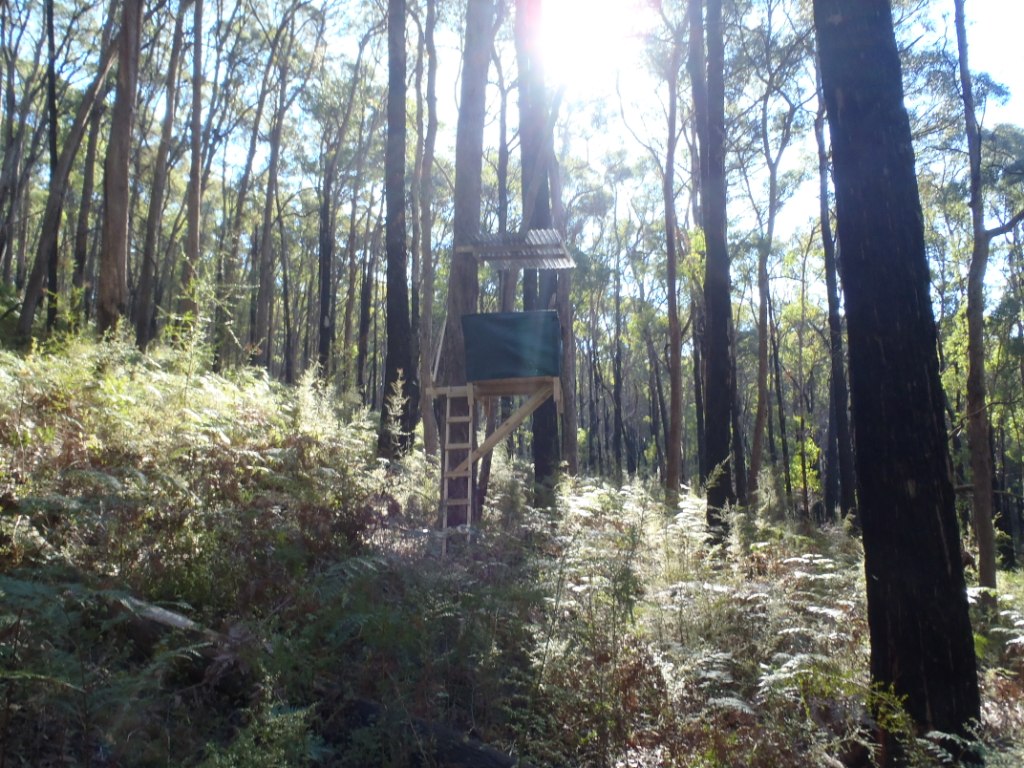
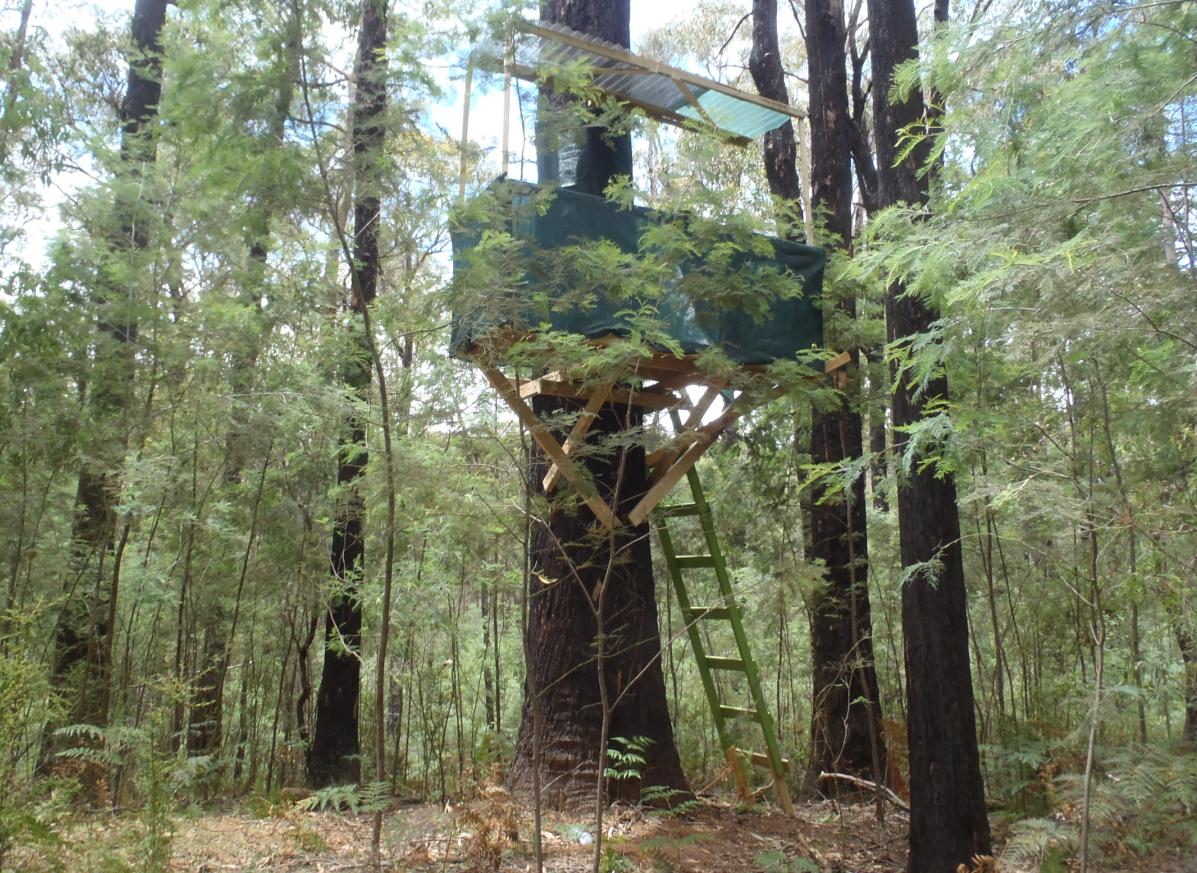
Greetings
from Victoria, Australia.
Please feel free to put these up on your website as I used your
design. Charles.
|
| |
|
| |

 |
| |
|
| |
 |
| |
|
| |
|
| |
|
| |
 |
| |
|
| |
 |
| |
|
| |
 |
| |
|
| |
 |
| |
|
| |
 |
| |
|
| |
 |
| |
|
